

Title Slide
Do you have what it takes to boost morale?
Audience: Principals and School Administrators
Responsibilities: Instructional Design, Storyboarding, Action Mapping, Script Writing, Graphic Design, eLearning Development, and Mockups
Tools Used: Articulate 360, PowerPoint, MindMeister, Google Docs, Adobe Creative Suite
The Problem:
The client, the Pleasant Union School, expressed issues with the morale in their school district. Many of the teachers had become dissatisfied with their work environments stating that the principal and school administration were lacking in areas of accountability, professional development, and autonomy for teachers. The client recognized a need for training on how best to address these issues and therefore reached out to discuss possible solutions.
The Solution:
I proposed a scenario-based solution where learners would make choices based on real-world evaluations of events and situations. Learners would be presented with possible solutions from which they would choose the most suitable answer. Each experience allows learners to make choices within a low-risk environment, experience the consequence of that choice, and receive feedback.
My Process:
I first consulted with stakeholders to identify the main concerns that needed addressing. After identifying the main concerns, I polled several SMEs asking specific questions related to those concerns. I created an action map to define and outline the goal.
Action Mapping
I used MindMeister to create an action map based on the polled results. I worked with the SMEs in identifying three major concerns - accountability, professional development, and autonomy.
The agreed-upon goal was to increase teacher job satisfaction by 20% within the next school year. The identified high-priority actions to increase teacher job satisfaction were mapped out along with relevant consequences that focused on what principals and school administration should do instead of focusing on obscure knowledge or facts.
Mind Meister Action Map
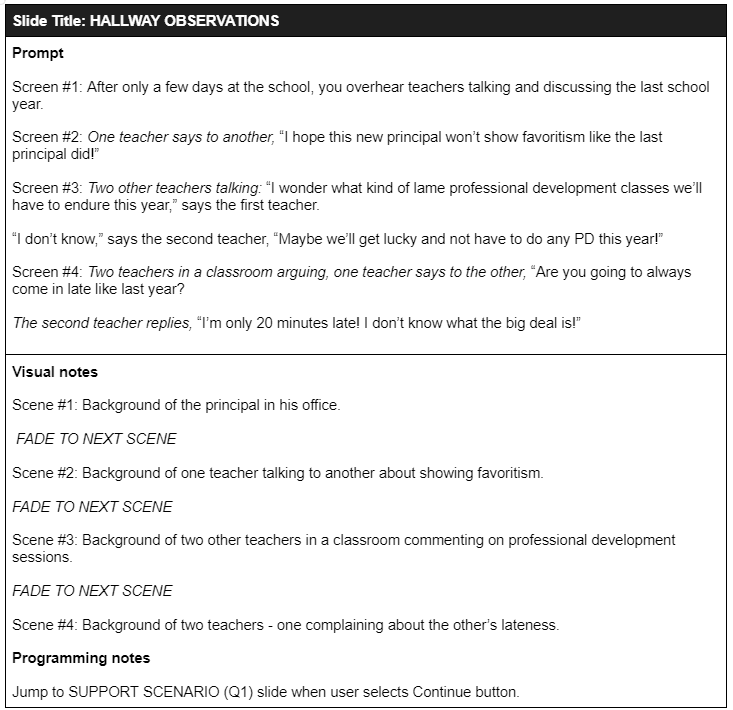
Scenario Storyboard
Text-based Storyboard
I created a text-based storyboard where I wrote out the details of each scenario based on the action map. Each scenario was scripted and included the content for each text box. The storyboard set the groundwork for the eLearning project and provided the client with a foundational reading of the scenarios including the choices and their consequences. I consulted with SMEs adjusting the scripts and texts as needed until a consensus was reached.
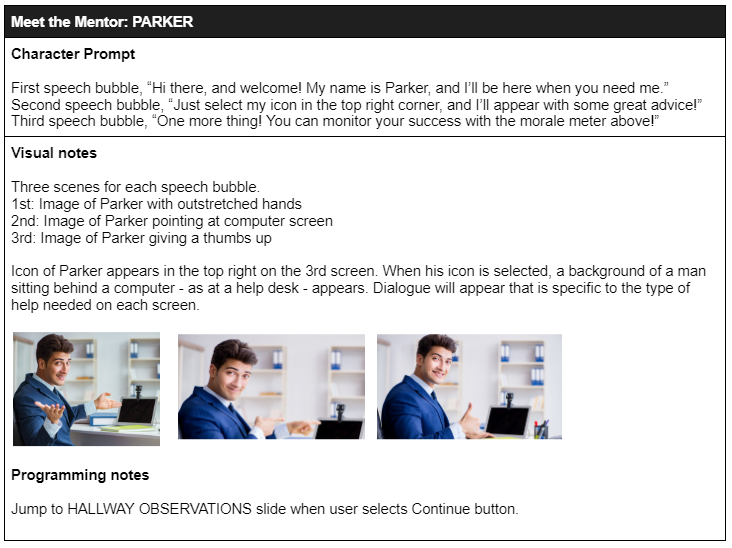
Meet the Mentor, Parker
Meet Parker
The storyboard also introduced the mentor, Parker, who would guide them in making decisions. Parker serves as an on-demand access for learners giving advice for choosing the best response to each scenario.
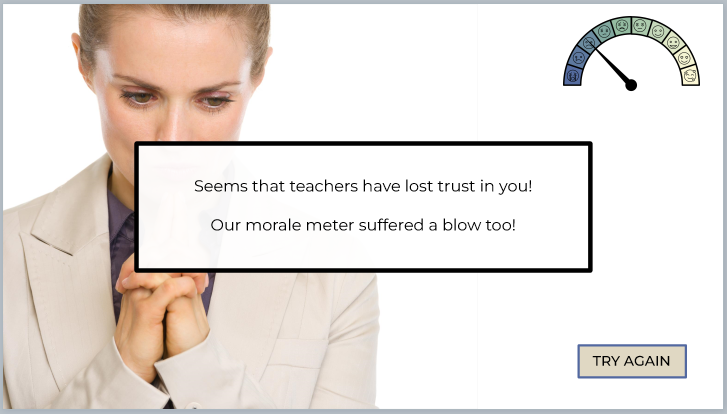
Consequence Slide
Visual Mockups
I used PowerPoint to create the visual mockups and iterate the scenarios. I customized the theme and selected the color scheme to match the chosen graphics. I also selected the fonts and created elements to be used. Using PowerPoint allowed me to set the scenes and some special effects before applying triggers in Storyline. It also provided quick iteration and application of feedback.
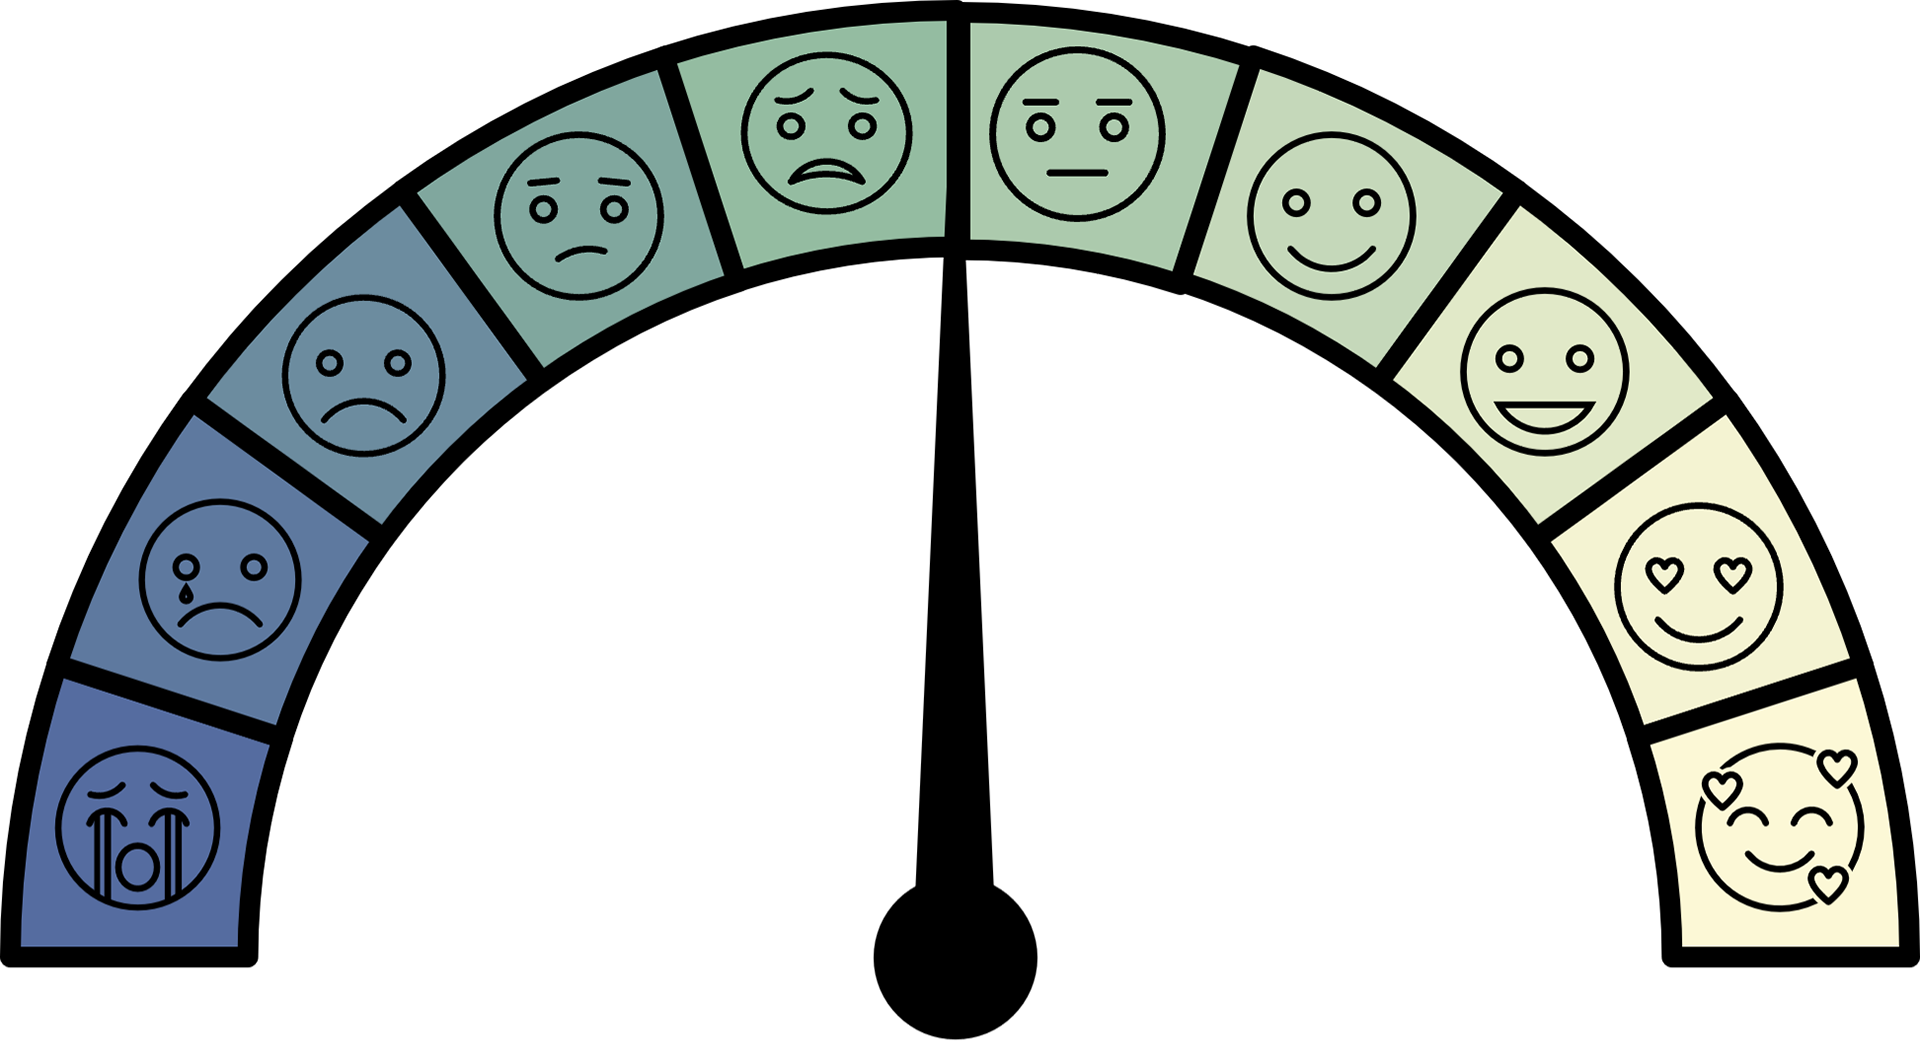
Mood Meter
Custom Graphics
Among the elements I created was a custom mood meter with a matching color scheme. The mood meter shows the progress of the learners as they move through the consequences. I created the meter using PowerPoint and customized it using emoji reactions to show positive and negative feedback.
Interactive Prototype
I imported my finalized visual mockups from PowerPoint into Articulate 360. From there, I published the first scenario to Review 360 to collect feedback on the process. Through Review 360, I gained valuable feedback on the functionality of the process at different stages and scenarios and was able to quickly hone and fine-tune those processes.
The biggest challenges I faced were entrance and exit timings which I quickly resolved. There were some minor wording issues and some text discontinuity between scenes. I resolved these by paraphrasing and clarifying the text. Some aesthetic elements were also noted, which I solved by adjusting opacity and readability.
An example of this can be seen here. In the bottom left photo, the opacity was set at 30%. While the text is still readable, the background images bleed through and cause a distraction. The bottom right photo’s opacity has been adjusted creating a significant increase in readability.
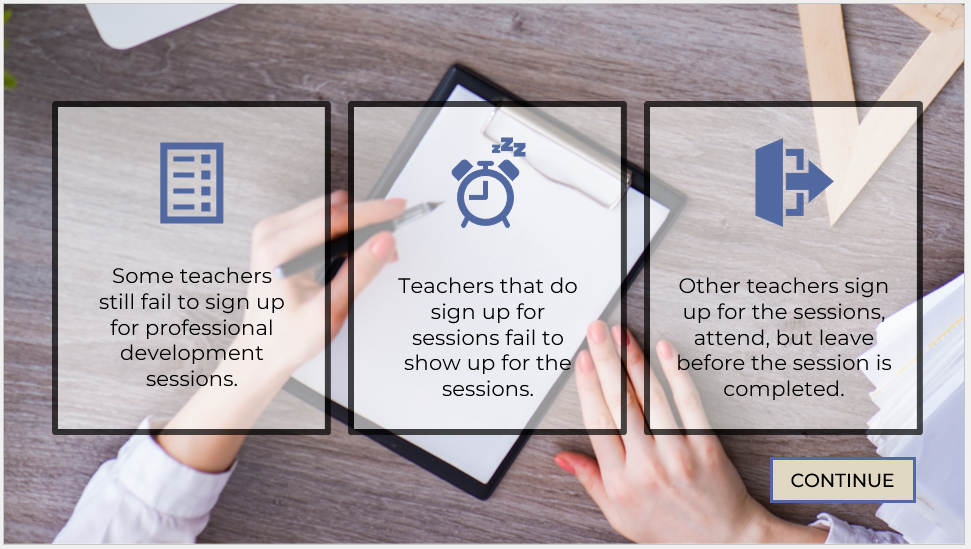
30% Opacity
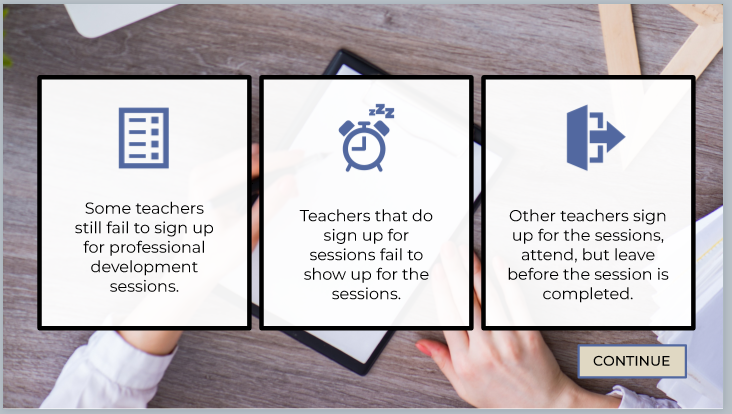
Increased Opacity
Full Development

Email to Staff

Choice Box
Once all feedback was obtained and the necessary adjustments were applied, I developed the final product and then published it.
The final product includes animations and transitions that communicate the message, buttons, and triggers that keep the learner moving through the course, and scenarios that immerse the learner in the story.
Some features to note:
* Realistic characters
* Mentor guidance
* Custom graphics
* Choice feedback
* Relevant consequences
* Aesthetic appeal
* Noticeable states
* Entrance/Exit animations
Results
I reconnected with the client for this project and asked them to work through the experience. Each participant reported enjoying the adventure.
Jennifer May noted, “I thought it was really good! I like that they get to choose options and work through the consequences.”
During the iteration process of this project, I came to realize that certain question and answer choices lacked coherence. I rectified these issues by rephrasing those questions to directly address the scenario-based issue. Through continuous iteration of grammar, syntax, navigation, and overall mechanics of the course, I was able to add the level of detail and polish needed.
Through ADDIE I identified the learning needs, designed a customized training program that addressed those needs, and evaluated the completed project's effectiveness. Using the principles of ADDIE especially guided me through the development and iteration processes of this project. Choosing the color scheme, adding graphics, and deciding on fonts had a huge bearing on the engagement aesthetic of the course. I believe the selection of the elements presents the course in a way that appeals to the learner as well as the client.
I enjoyed working with PowerPoint for this project and realized just how powerful a tool it is. Many of the same features in Articulate 360 are found in PowerPoint, which cut the designing time down and increased efficiency in the development of the final product. Slides and scenes are readily imported to Articulate 360 as well as many animations, transitions, buttons, and triggers. I was also able to view the project as a slideshow within PowerPoint with these elements enabled before building in Storyline allowing me to hone and fine-tune many processes with little effort and time spent.
Takeaways
If I were to redo this project, I would increase the functionality of the mood meter by using variables to adjust accordingly with answer choices. The mood meter is the element I am most proud of because I created it from scratch within PowerPoint. I saw a meter that I liked as a jpeg, but the color scheme did not match my project and the gauge was immovable. I took on the challenge of creating a similar meter that would host the correct colors and that could also be adjusted to show different mood levels. I had some trouble getting the color scheme correct and reached out to Nicole Stephens, a mentor, and expert in the field, who gave me some great advice on how to set the colors so they would blend and match.
Through this project, I gained a working knowledge of Articulate 360 by using triggers, states, and layers. I also increased my proficiency with PowerPoint by creating elements, using animations and transitions, and through graphics manipulations. I was introduced to and gained experience with Adobe products, such as Illustrator and Photoshop, as well.